 This Kusudama Flower comes inspired by a woman who I had worked with for years, but had not had the chance to get to know until a few months before she left on maternity leave. Working in a call center we are constantly trying to find things that will occupy our hands, and pass the time in between taking calls and especially on the slow nights. She would sit at her desk and fold paper for hours on end. I soon found out that, not only did she do this to pass time, but she had her own little business where she would make bouquets out of these neat and cute little flowers, and sell them as center pieces or wedding bouquets! They can make a wonderful arrangement and can be made to match any theme from baby shower (boy or girl) to weddings, to even just a birthday! With a creative mind I even learned how to make them and made a Christmas wreath out of these bad boys!
So now I bring to you this tutorial on how to fold them. It is rather quite easy and does pass a lot of time, even while just sitting watching t.v., or passing time on a bus trip, or if you, like myself, work in a call center and are eager to find something to pass the long hours on a night shift!
Supplies You Will Need:
- Post It notes (Yes post it notes!) If you don’t have any, you can use any type of paper. The best size is 3″ x 3″
- Glue stick (If you are using thick paper, like scrapbook paper, I used a low temp glue gun)
- (optional) Styrofoam ball/ wreath – depending on what you are making
- (optional is using Styrofoam shape) long pins
Lets get started shall we!

Take your pick of colors you are wanting to use. Make sure if you are only using one or two colors that you grab A LOT of them! Each flower uses 5 sheets.
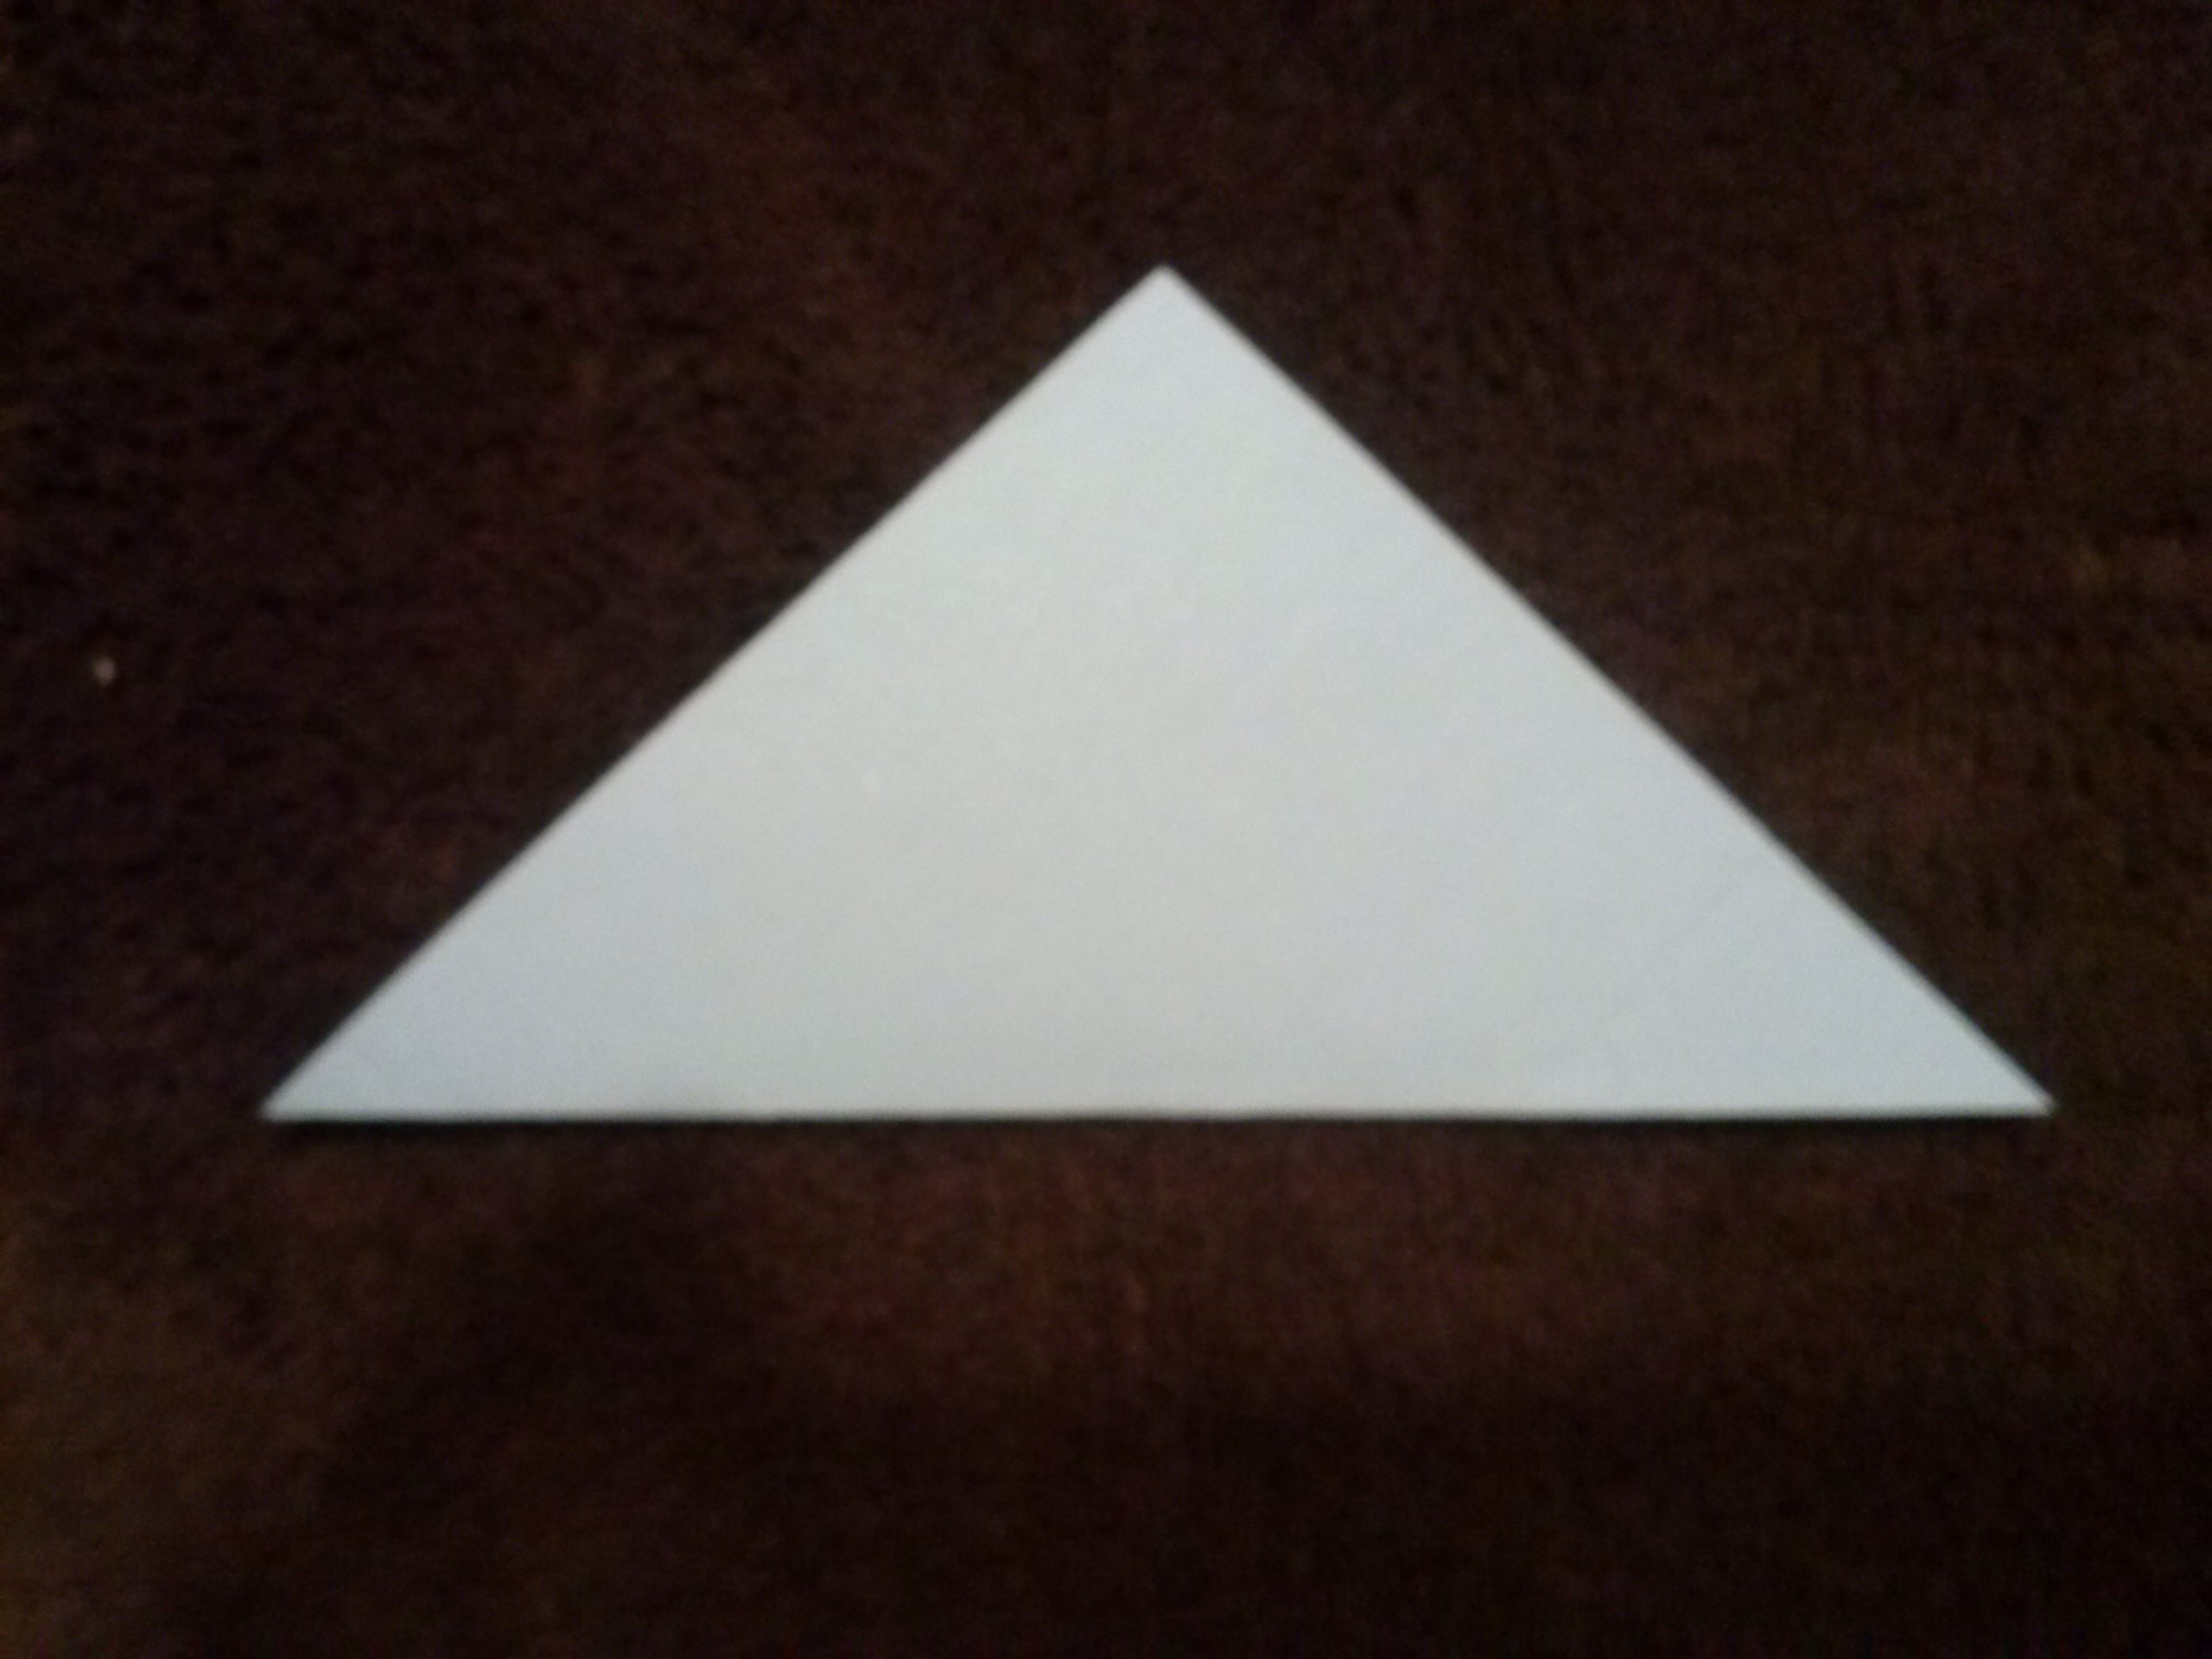

First fold your post it in half to make a triangle.
Next, fold each corner inward to meet in the center (it should look like a diamond with both folded inward)

Next:
This step is not necessary but makes your life a bit easier for the next step!
Fold the corners out so the edge is in line with the outer edge of the diamond, it should like the picture above.
Now that you have creased the edges of this step, its a lot easier to do this step.
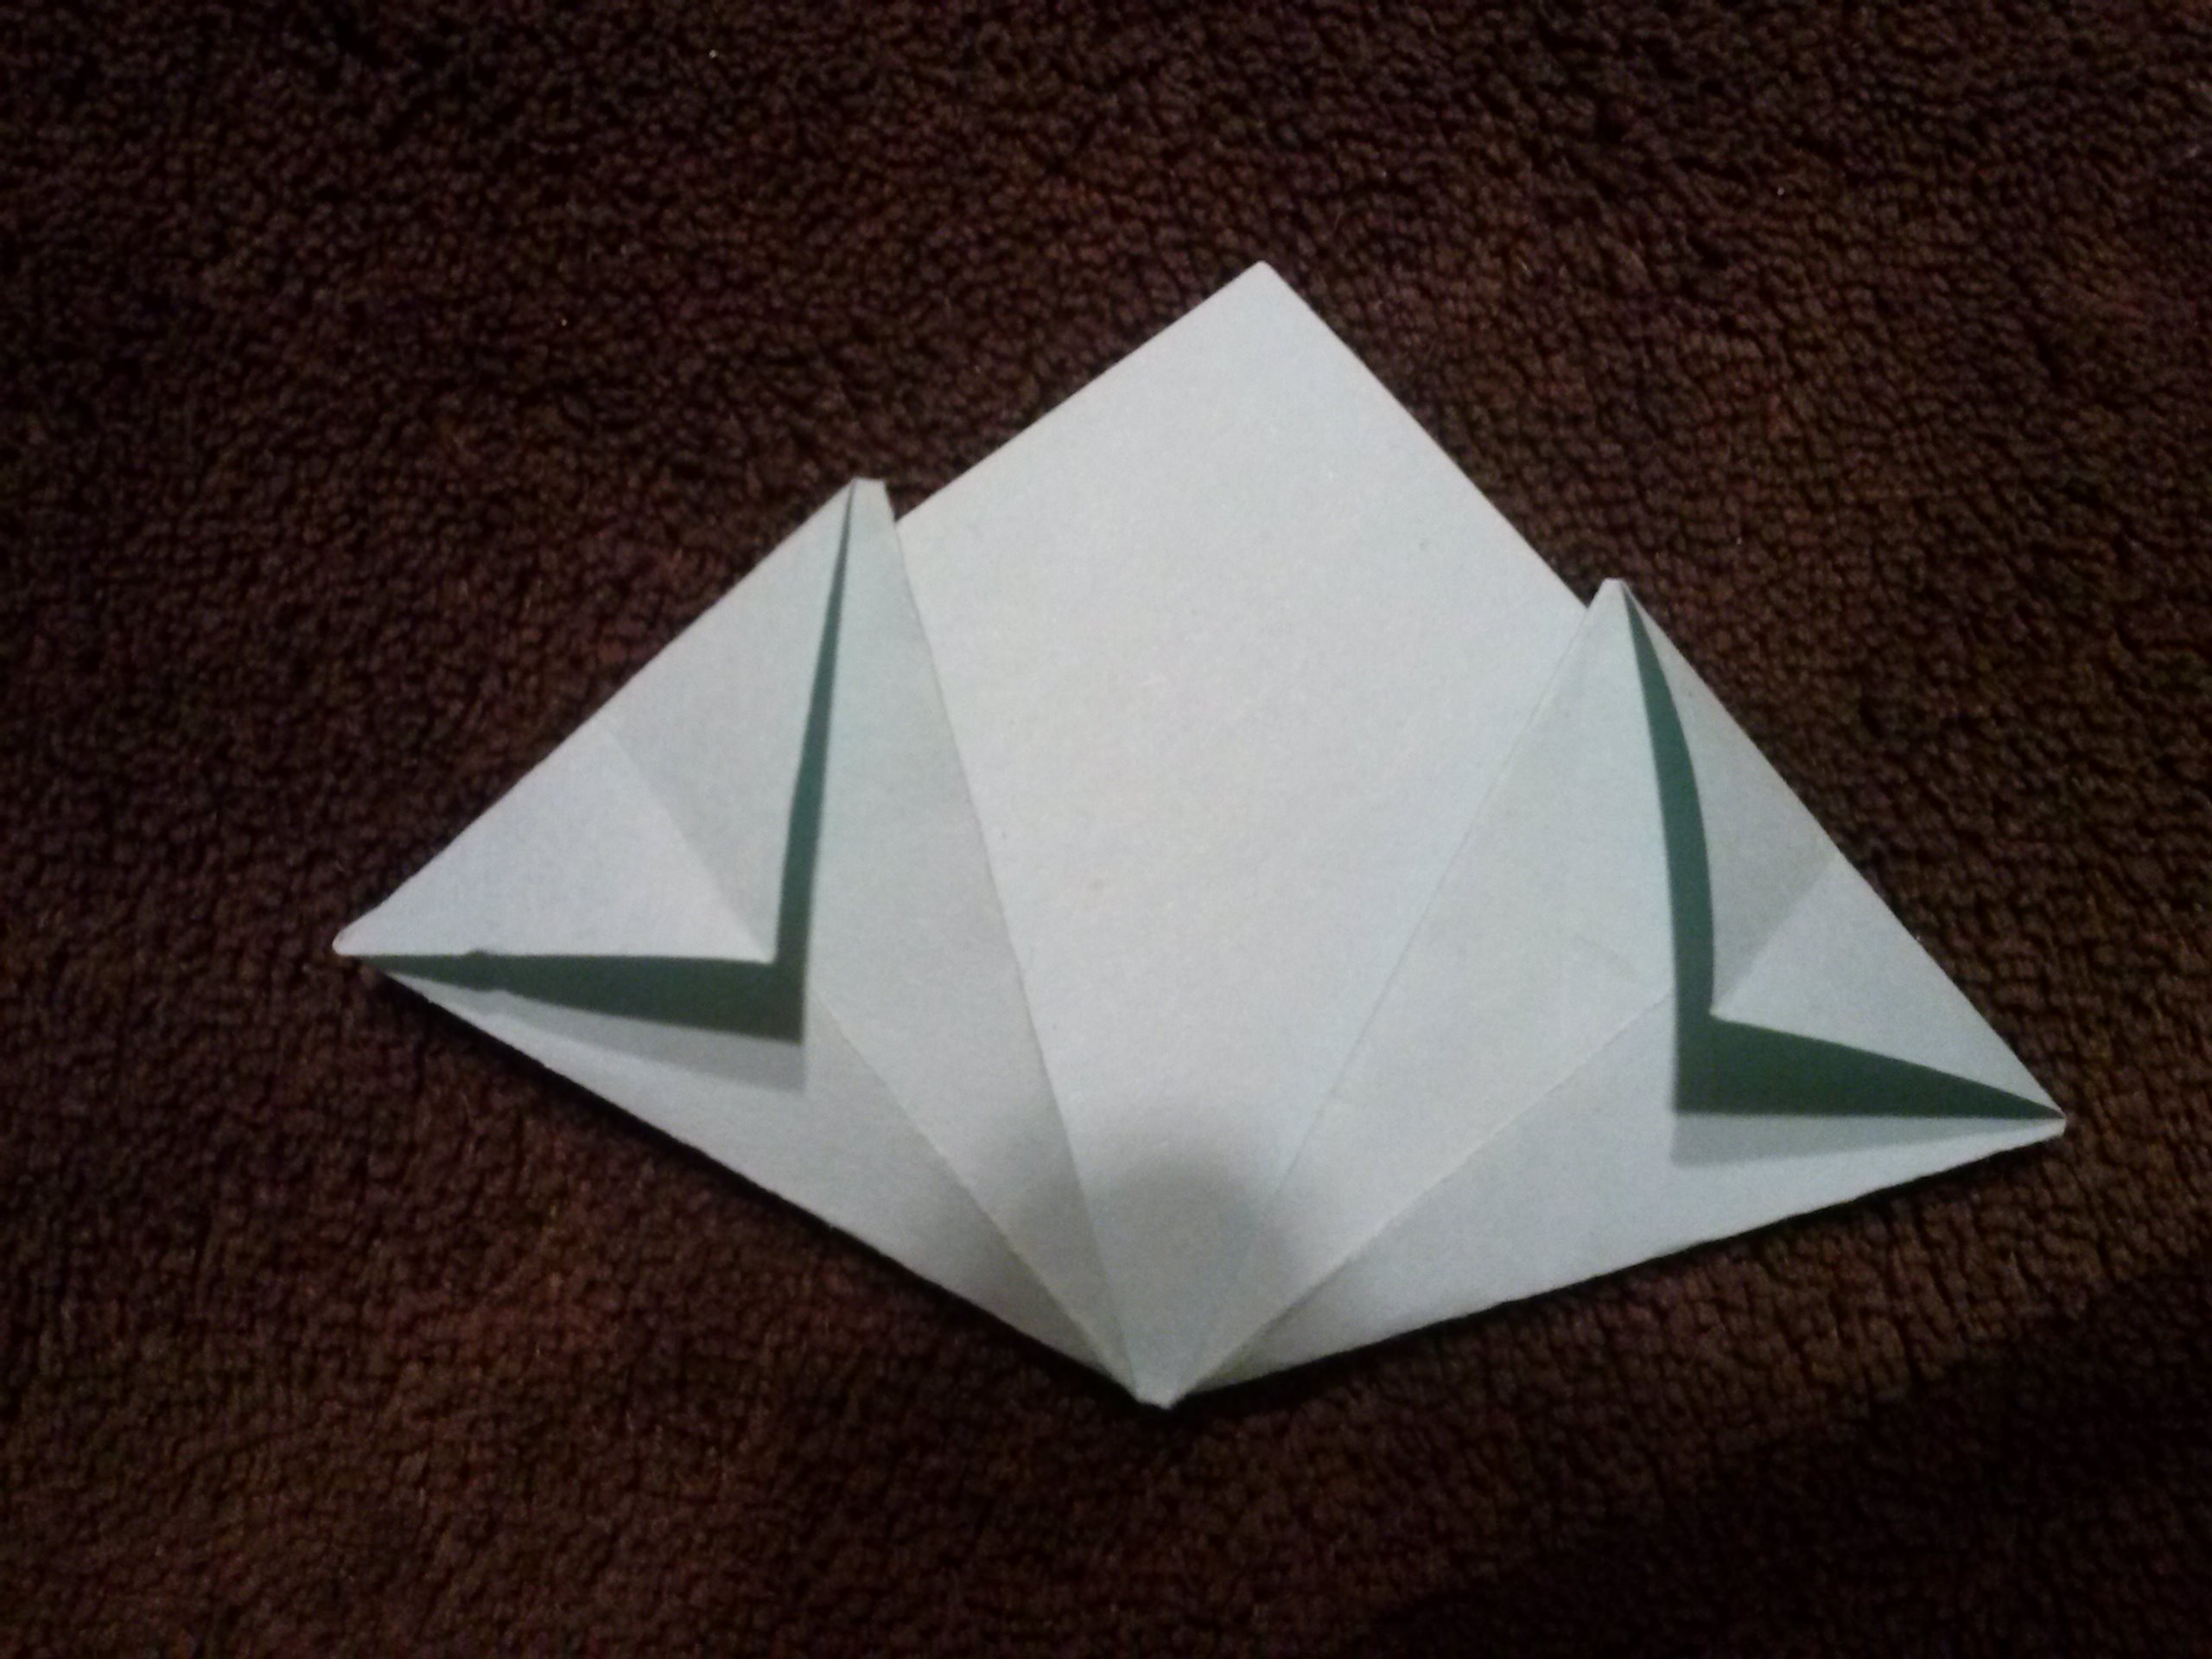
Open up the fold, there should be a small pocket, and flatten it out to look like this. Now fold down then tips inwards, these will give your petal the inner detailing.

Now fold on the center crease, this will give you the surface to glue on as well as double the inner detailing of the flower.
Now take the edges and fold together, DO NOT CREASE! You want your flower petals to be rounded. They should look like this.


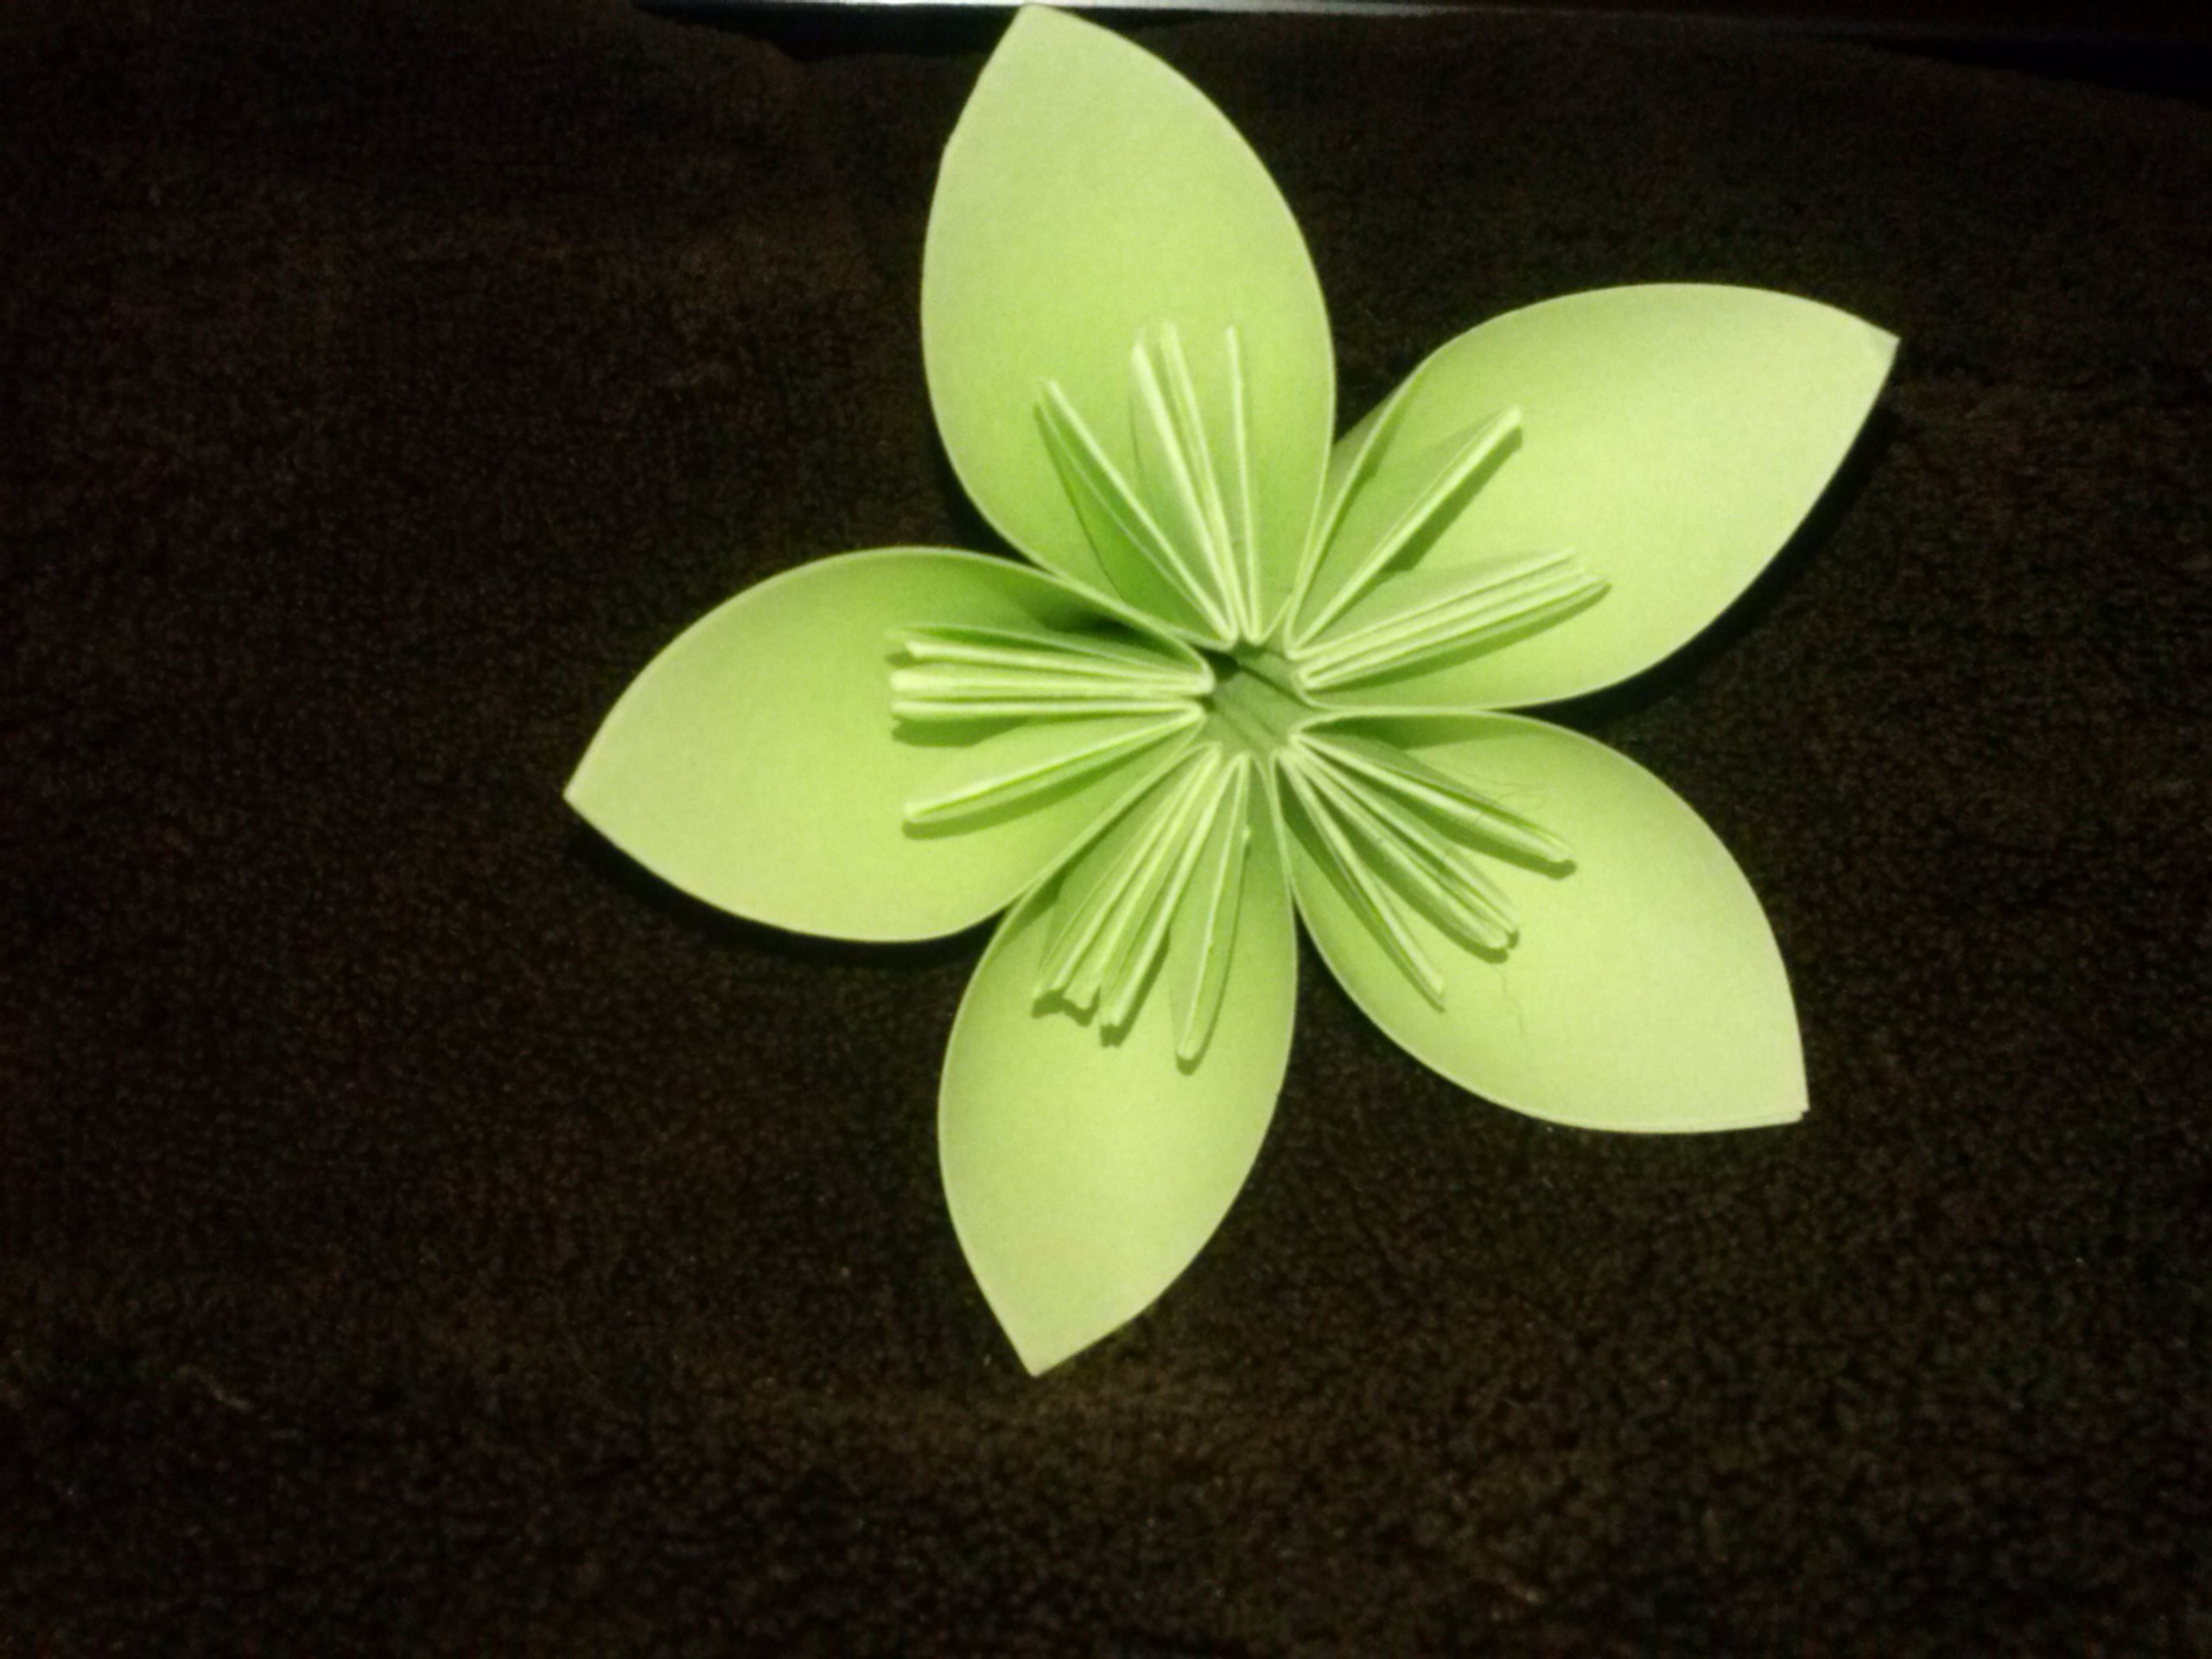
As I had said previously, each flower will need 5 petals, so make lots and lots and lots of these! And I mean A LOT! (Are you starting to see why this occupies my slow nights?!)
Take each petal and glue together. Matching up the seams so they look like this
And there you have it! You have made a pretty green flower!
Now, there are a few different ways to make arrangements. One being gluing the petals together in a fashion to make a ball with no Styrofoam shapes. I find it difficult to do so while trying to make a large arrangement. For larger arrangements I use a small ball and long pins to place the flowers in which ever way I prefer. Here is a look at both ways.


On the left:
See how you would glue the petals together. Continue around until it is the desired size. Adding on top and bottom to create a ball.
On the right:
Using the Styrofoam ball you also create the look of the yellow middle, I tend to glue small beads of complimenting colors.
So go ahead my lovelies and try out different color formations and techniques! These flowers can even be used on their own as a simple decoration, adding to corners of picture frames, or which ever way you please! I would LOVE to know how they turn out!
Cheers!
